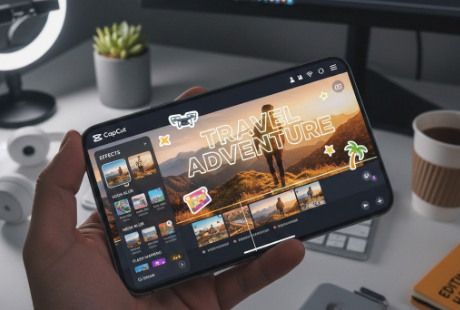
Video content dominates the internet today. From Instagram Reels and TikTok clips to YouTube videos, anyone who wants to grow online needs a reliable way to create polished videos. That’s where CapCut comes in. I’ve been experimenting with CapCut for months, and as a beginner, I’ve found it surprisingly powerful, intuitive, and full of features that even professional editors love. In this guide, I’ll walk you through how to use CapCut in 2026 and share my own tips, tricks, and real-life experiences to help you start creating videos that look professional, even if you’ve never edited a video before.
Why I Recommend CapCut in 2026

When I first tried CapCut, I expected a simple app with basic tools. What I discovered was far more impressive:
- Beginner-Friendly Interface: Everything is drag-and-drop, and you don’t need to memorize complicated menus.
- Templates That Work: CapCut’s pre-designed templates make it easy to create viral-style videos in minutes.
- AI Tools That Actually Help: The automatic subtitle generator and scene recognition save hours of work.
- High-Quality Exports: My first video exported in 4K, and it looked professional on my phone and desktop.
- Free Access: Most features are free, and there’s no watermark unless you want advanced premium features.
From my experience, CapCut hits the sweet spot between simplicity and capability — perfect for beginners who want professional-looking results without frustration.
Step 1: Downloading and Installing CapCut
Downloading CapCut is straightforward:
- Open Google Play Store (Android) or App Store (iOS). Click Here:
- Search for “CapCut” and tap Install.
- Once installed, open the app and sign in using Google, Apple, or Facebook.
My tip: Always sign in. I learned the hard way that projects aren’t saved locally if the app crashes, so cloud backup is a lifesaver.
Step 2: Creating Your First Project
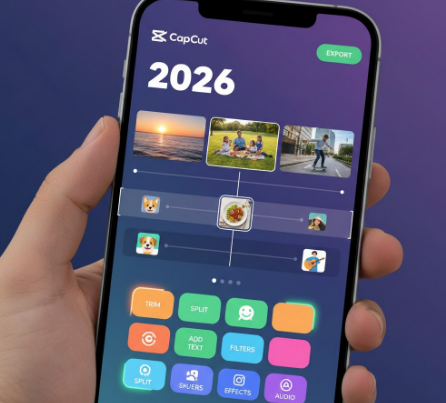
After opening the app:
- Tap “New Project”.
- Choose the video clips or photos you want to edit. I usually pick short clips first to practice, then move to longer videos.
- Tap Add to bring them into the timeline.
The timeline can seem overwhelming at first, but don’t worry — start simple. Even moving clips around and trimming small sections will give you confidence.
Step 3: Essential Editing Tools I Always Use
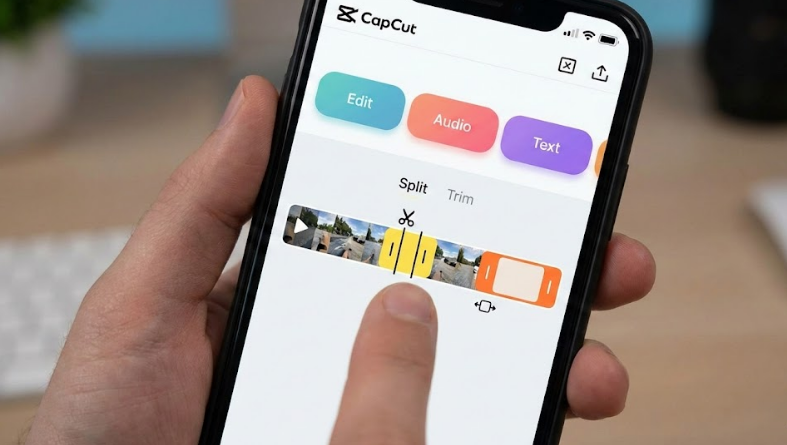
Trim & Split
- Trimming helps remove unnecessary parts quickly.
- Splitting allows you to insert transitions or effects mid-video.
My tip: Always watch the full clip first and note where you want cuts. It saves time and keeps your video clean.
Adjust Speed
- Use slow motion for dramatic effects or fast motion for fun, energetic content.
I like using slow motion at the end of a video to emphasize a key moment — it works surprisingly well for Reels.
Text & Captions
- Adding text is crucial for engagement. You can highlight key points or add humor.
Tip from me: Use different text styles for emphasis. For example, bold for important words, animated for fun phrases. This keeps viewers reading without feeling cluttered.
Filters & Effects
- Filters instantly improve your video’s aesthetic.
- Effects like glitches or cinematic transitions make videos feel professional.
I prefer starting with one or two effects. Overusing them can distract viewers from your main content.
Step 4: Intermediate Features I Found Useful
AI Subtitle Generator
- Automatically adds subtitles to your videos.
From personal experience, subtitles dramatically improve engagement, especially if your viewers watch without sound.
Keyframe Animations
- Allows movement of text or objects across the screen.
Tip: I animate only small elements. Subtle motion looks more professional than excessive spinning text.
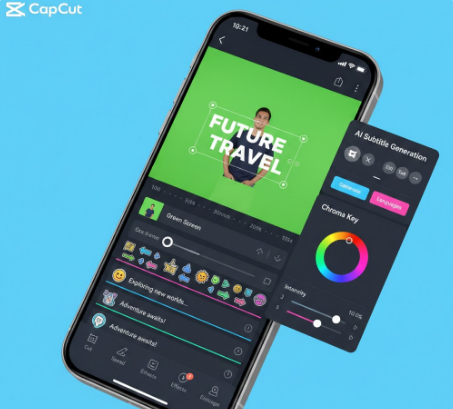
Chroma Key (Green Screen)
- Lets you remove backgrounds and add custom visuals.
I use this for fun reaction videos or storytelling clips. It’s surprisingly easy in CapCut compared to other apps.
Stickers & Overlays
- Adds personality to your videos.
My personal favorite: adding subtle emoji reactions or small animations to highlight punchlines or reactions.
Step 5: Adding Music and Sound Effects
Music makes a huge difference. CapCut lets you add tracks easily:
- Tap Audio → Sounds for CapCut’s free music library.
- Upload your own tracks or record a voiceover.
- Sync audio with your clips and adjust fade-in/fade-out for smooth transitions.
My experience: Adding trending audio can increase the chances of your videos going viral. But don’t just follow trends blindly — pick music that fits the vibe of your content.
Step 6: Exporting Videos Like a Pro

After editing:
- Tap the Export button at the top.
- Choose resolution (1080p or 4K) and frame rate (30fps or 60fps).
- Export and save the video to your device.
I always check my exported video on multiple devices before posting. Sometimes minor adjustments are needed for mobile vs desktop playback.
Real Tips From My Editing Journey
Here are some things I learned while using CapCut as a beginner:
- Start Small: Don’t overwhelm yourself with long videos at first. Practice with 15–30 second clips.
- Use Templates Wisely: Trending templates can save time but customize them to make your video unique.
- Consistency is Key: Using similar colors, fonts, and transitions across videos builds a recognizable style.
- Subtlety Wins: Overusing effects, stickers, or animations can make videos look amateurish. Less is often more.
- Engage With Captions: Even on short clips, captions improve watch time. Always add text if there’s speech or important information.
Frequently Asked Questions (FAQ) About CapCut 2026

1. Is CapCut suitable for beginners in 2026?
Yes! CapCut is one of the most beginner-friendly video editing apps available in 2026. Its simple drag-and-drop interface, clear menu options, and AI-assisted tools like automatic subtitles and scene recognition make it easy for anyone to start editing videos, even with no prior experience. Personally, I found that I could create polished short clips within an hour of first opening the app.
2. Do I need to pay to use CapCut?
Not at all. CapCut’s core features are completely free, including trimming, adding text, basic effects, and exporting videos. Some advanced features, templates, or effects are available as premium add-ons, but beginners can create high-quality videos without spending a dime. In my experience, free features are more than enough for social media content.
3. Can I make TikTok and Instagram Reels using CapCut?
Absolutely. CapCut is optimized for short-form social media videos. It has pre-sized templates for TikTok, Instagram Reels, and YouTube Shorts, so you don’t need to manually adjust video dimensions. Using trending templates and music can help your videos get noticed faster.
4. Does CapCut export videos in high quality?
Yes. CapCut supports exporting in 1080p and 4K resolution, with frame rates of 30fps or 60fps. I’ve personally exported videos in 4K for YouTube, and they looked clean and professional, even on larger screens. High-quality export ensures your videos look polished on all platforms.
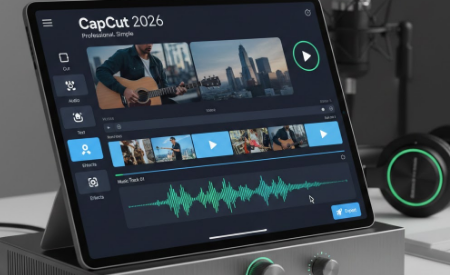
5. Can I use CapCut on both mobile and desktop?
Currently, CapCut is primarily mobile-focused, available for Android and iOS devices. However, CapCut Web allows you to edit videos on a computer browser with many of the same features as the mobile app. This is helpful for users who prefer larger screens or multitasking while editing.
6. What are some beginner-friendly CapCut tips?
From my personal experience, these tips help beginners:
- Start with short clips (10–30 seconds) before moving to long videos.
- Use templates for trendy effects, then customize them.
- Add captions to improve engagement, especially for viewers watching without sound.
- Avoid overusing effects and stickers; subtle edits look more professional.
- Experiment with slow-motion or fast-motion to make your clips more dynamic.
7. Can I remove backgrounds with CapCut?
Yes. CapCut’s Chroma Key feature lets you remove or replace video backgrounds. This is especially useful for creative content, reaction videos, or storytelling. In my experience, it’s surprisingly easy for beginners — just shoot your video in front of a solid background and adjust the settings.
8. What should I do if CapCut crashes or lags?
Common solutions include:
- Closing background apps to free up memory.
- Restarting the app or your device.
- Lowering the video resolution during editing.
- Updating CapCut to the latest version.
From trial and error, I found that clearing the cache and restarting the app fixed most minor crashes or lag issues.
9. Are CapCut templates effective for creating viral videos?
Yes, but with a twist. Templates give you a head start with trendy effects and transitions. However, I recommend personalizing them by adding your own text, clips, and music. Videos that are too template-heavy often feel generic, while customized templates can increase engagement and shareability.
10. How long does it take to learn CapCut as a beginner?
It depends on your practice. Most beginners, including myself, can create basic videos in a few hours. Within a week of consistent use, you can confidently trim, split, add text, use templates, and export videos like a pro. CapCut’s learning curve is gentle compared to professional software like Premiere Pro or Final Cut Pro.
Conclusion: My Final Thoughts
CapCut in 2026 is an incredible tool for beginners and pros alike. From my experience, it’s one of the few video editors that lets you grow from novice to advanced without overwhelming you. Its templates, AI tools, and easy-to-use features make it possible to create professional-quality videos within minutes.
The key is to practice, experiment, and personalize your videos. Start with simple edits, explore templates, add subtle effects, and gradually incorporate advanced features. By following this guide and applying my personal tips, you’ll not only become comfortable with CapCut but also create engaging videos that stand out in 2026’s fast-moving social media landscape.